No edit summary |
(→Notes) Tag: Visual edit |
||
| (25 intermediate revisions by 16 users not shown) | |||
| Line 2: | Line 2: | ||
| name = Operation Gamma |
| name = Operation Gamma |
||
| faction = FedRomKDF |
| faction = FedRomKDF |
||
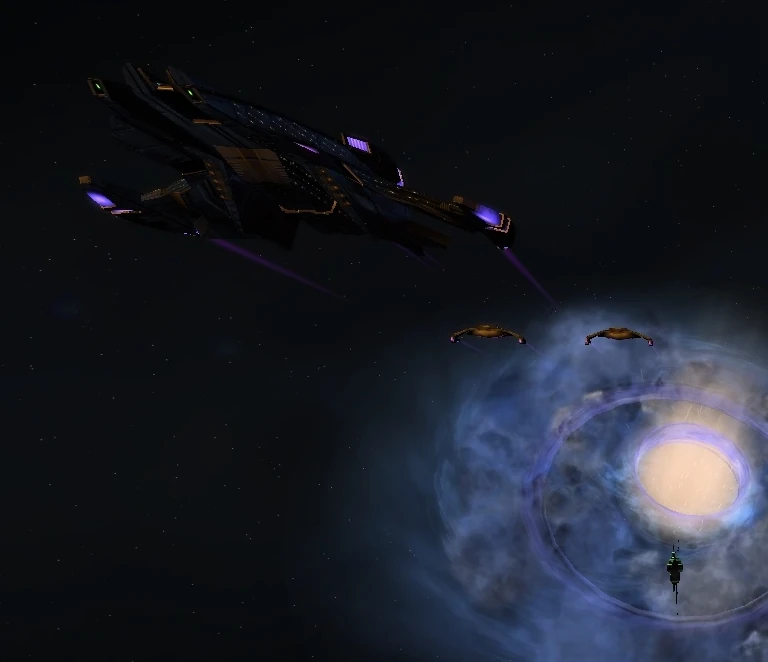
| + | | image = Eraun's flotilla.jpg |
||
| giver = Mesi Achebe |
| giver = Mesi Achebe |
||
| level = [[rank|43+]] |
| level = [[rank|43+]] |
||
| Line 7: | Line 8: | ||
| followed = Facility 4028 |
| followed = Facility 4028 |
||
| preceded = Of Bajor |
| preceded = Of Bajor |
||
| + | | episode = Lost Dominion |
||
| − | | fedepisode = Cardassian Struggle |
||
| − | | kdfepisode = Dominion Domination |
||
| − | | romepisode = Cardassian Struggle |
||
| released = Feb. 25, 2012 |
| released = Feb. 25, 2012 |
||
| − | | sp = Lv 50: 3855 |
+ | | sp = 4300 <!-- Lv 50: 3855 / RRF Lv 50: 4961 --> |
| − | | bosp = Lv 50: 3366 |
+ | | bosp = 4125 <!-- Lv 50: 3366 / RRF Lv 50: 4331 --> |
| reward = |
| reward = |
||
| plus = |
| plus = |
||
| Line 48: | Line 47: | ||
Report to Deep Space Nine and enter the Bajoran wormhole. |
Report to Deep Space Nine and enter the Bajoran wormhole. |
||
| − | Deep Space Nine is located in the Bajor Sector of the |
+ | Deep Space Nine is located in the Bajor Sector of the Alpha Quadrant}} |
| − | }} |
||
{{missionnote| |
{{missionnote| |
||
This is a small craft mission! You will need to use a shuttle, fighter or other small craft to complete this Episode! |
This is a small craft mission! You will need to use a shuttle, fighter or other small craft to complete this Episode! |
||
| Line 66: | Line 64: | ||
* Salvaged Relationships |
* Salvaged Relationships |
||
** Go to Navigational Beacon |
** Go to Navigational Beacon |
||
| + | ** [[File:Temporal objective.png]] Investigate Temporal Probe ([[Temporal Agent]]) |
||
** Warp to Next System |
** Warp to Next System |
||
** Destroy Shield Generator |
** Destroy Shield Generator |
||
| Line 71: | Line 70: | ||
** Hail the Krannek |
** Hail the Krannek |
||
** Assist Farek |
** Assist Farek |
||
| − | *** Salvage Materials (0/4) |
+ | *** <span style="color:yellow">[Engineering]</span> Salvage Materials (0/4) |
| − | *** Deactivate Defense Satellites (0/4) |
+ | *** <span style="color:red">[Tactical]</span> Deactivate Defense Satellites (0/4) |
| − | *** Recover Particle Traces (0/4) |
+ | *** <span style="color:turquoise">[Science]</span> Recover Particle Traces (0/4) |
** Rendezvous with the Krannek |
** Rendezvous with the Krannek |
||
** Defeat Idran Swarmer Groups (0/3) |
** Defeat Idran Swarmer Groups (0/3) |
||
| Line 98: | Line 97: | ||
==== Dominion ==== |
==== Dominion ==== |
||
| − | * |
+ | * [[Weyoun]] |
</div> |
</div> |
||
| Line 105: | Line 104: | ||
=== Allies === |
=== Allies === |
||
==== Federation ==== |
==== Federation ==== |
||
| − | * [[Typhoon Class Battleship]] |
+ | * [[Typhoon Class Battleship|<s>Typhoon Class Battleship</s>]] (Replaced with a Fed. Command battle crusier after they were introduced to the game) |
==== Ferengi ==== |
==== Ferengi ==== |
||
| Line 115: | Line 114: | ||
==== Dominion ==== |
==== Dominion ==== |
||
* [[Work Bee]] |
* [[Work Bee]] |
||
| − | * [[Jem'Hadar Fighter]] |
+ | * [[Jem'Hadar Fighter (Mob)|Jem'Hadar Fighter]] |
| − | * [[Jem'Hadar Attack Ship]] |
+ | * [[Jem'Hadar Attack Ship (Mob)|Jem'Hadar Attack Ship]] |
* [[Jem'Hadar Heavy Escort]] |
* [[Jem'Hadar Heavy Escort]] |
||
* [[Jem'Hadar Dreadnought]] |
* [[Jem'Hadar Dreadnought]] |
||
| Line 125: | Line 124: | ||
</div> |
</div> |
||
| − | == |
+ | ==Accolades== |
{| border="2" class="wikitable" width="100%" |
{| border="2" class="wikitable" width="100%" |
||
|- |
|- |
||
! Icon !! Name !! Description || How to Get || Points |
! Icon !! Name !! Description || How to Get || Points |
||
|- |
|- |
||
| − | | align="center" | {{accoladeIcon|Anomaly Master}} || Anomaly Master || Completed the Science Option while playing the weekly episode Operation Gamma || Scan the four spatial anomalies in the blue asteroids || 10 |
+ | | align="center" | {{accoladeIcon|Anomaly Master}} || [[Accolade/Story Accolade/Cardassian Struggle#Operation Gamma|Anomaly Master]] || Completed the Science Option while playing the weekly episode Operation Gamma || Scan the four spatial anomalies in the blue asteroids || 10 |
|- |
|- |
||
| − | | align="center" | {{accoladeIcon|Satellite Technician}} || Satellite Technician || Completed the Tactical Option while playing the weekly episode Operation Gamma|| Scan the four Defense Satellites in the red asteroids || 10 |
+ | | align="center" | {{accoladeIcon|Satellite Technician}} || [[Accolade/Story Accolade/Cardassian Struggle#Operation Gamma|Satellite Technician]] || Completed the Tactical Option while playing the weekly episode Operation Gamma|| Scan the four Defense Satellites in the red asteroids || 10 |
|- |
|- |
||
| − | | align="center" | {{accoladeIcon|Master Salvager}} || Master Salvager || Completed the Engineering Option while playing the weekly episode Operation Gamma || Salvage the resources from the four ships in the yellow asteroids || 10 |
+ | | align="center" | {{accoladeIcon|Master Salvager}} || [[Accolade/Story Accolade/Cardassian Struggle#Operation Gamma|Master Salvager]] || Completed the Engineering Option while playing the weekly episode Operation Gamma || Salvage the resources from the four ships in the yellow asteroids || 10 |
|- |
|- |
||
| − | | align="center" | {{accoladeIcon|Best Served Cold}} || Best Served Cold || You destroyed Farek at the End of Operation Gamma || Decide to destroy Farek to earn the Vorta's trust || 10 |
+ | | align="center" | {{accoladeIcon|Best Served Cold}} || [[Accolade/Story Accolade/Cardassian Struggle#Operation Gamma|Best Served Cold]] || You destroyed Farek at the End of Operation Gamma || Decide to destroy Farek to earn the Vorta's trust || 10 |
|- |
|- |
||
| − | | align="center" | {{accoladeIcon|Best Served Cold}} || Kind-Hearted || You let Farek escape at the end of Operation Gamma || Decide to let Farek go. || 10 |
+ | | align="center" | {{accoladeIcon|Best Served Cold}} || [[Accolade/Story Accolade/Cardassian Struggle#Operation Gamma|Kind-Hearted]] || You let Farek escape at the end of Operation Gamma || Decide to let Farek go. || 10 |
|} |
|} |
||
| Line 174: | Line 173: | ||
** {{item|Jem'Hadar Combat Impulse Engines|Mk <>|very rare}} |
** {{item|Jem'Hadar Combat Impulse Engines|Mk <>|very rare}} |
||
** {{item|Jem'Hadar Deflector Dish|Mk <>|very rare}} |
** {{item|Jem'Hadar Deflector Dish|Mk <>|very rare}} |
||
| − | ** Current |
+ | ** {{item|Current Lock Box||common}} |
| − | {| class="wikitable" style="text-align: center; |
+ | {| class="wikitable" style="text-align: center;" |
! width="75" | [[Level]] |
! width="75" | [[Level]] |
||
| − | ! width=" |
+ | ! width="170" | [[Player rank|Rank]] |
! width="40" | {{hint|SP|Skill Points|#69c}} |
! width="40" | {{hint|SP|Skill Points|#69c}} |
||
! width="40" | {{hint|Exp|Expertise|#69c}} |
! width="40" | {{hint|Exp|Expertise|#69c}} |
||
! width="60" | [[Mark]] <> |
! width="60" | [[Mark]] <> |
||
|- |
|- |
||
| − | | 43–49 || {{ |
+ | | 43–49 || {{fedonly}} '''Rear Admiral'''<br />{{klgonly}} Brig. & Maj. '''General'''<br />{{romonly}} '''Subadmiral''' || 1935 || 1856 || '''X''' |
|- |
|- |
||
| 50 || {{romonly}} '''Vice Admiral''' || 2232 || 1949 || '''XI''' |
| 50 || {{romonly}} '''Vice Admiral''' || 2232 || 1949 || '''XI''' |
||
|} |
|} |
||
| + | {{clear}} |
||
| − | == Notes == |
+ | == Feature Episode Notes == |
| + | * Third of five missions of the fourth [[Feature Episode]] ''[[The 2800]]'' released in February/March 2012. The missions were included for all factions at the end of the [[Cardassian Struggle]]/Dominion Domination storyline episode. |
||
| ⚫ | * If a character does not already own a shuttle or small craft, accepting this mission will grant a new ship slot and a free shuttle token (valid for a [[Type-8 Shuttlecraft]] for Starfleet captains or a [[ |
||
| + | * The mission is part of the [[Feature episode#Re-Runs|Feature Episode re-runs]], and as such eligible for limited time, special mission rewards. |
||
| − | * Players must be in their small craft to start the mission. Visit the [[:Category:Starship Selection Officers|Starship Selection Officer]] in the transporter room on board your starship or in the shipyard of Deep Space 9. - (No Longer Valid with Romulan announcement. Players must ONLY own a small craft to start. The game will automatically spawn you in your small craft) |
||
| + | ** During the second re-run (October 31 to December 5, 2013) the mission was eligible for the daily [[Lobi Crystal]] reward (once 15 {{LC}} per player account and day). |
||
| − | * It is a good idea to equip your small craft with either a turret or a standard shuttle beam array. The swarmers that you face near the end are difficult to defeat without full 360 degree weapon coverage. |
||
| + | == Notes == |
||
| − | ===[[Lobi Crystal|Hidden Lobi Crystal]]=== |
||
| + | * Prior to [[Victory is Life]], Weyoun's role was taken by the original character [[Eraun]]. Due to a glitch both Weyoun and Eraun's voices can be heard during the cutscene. |
||
| − | * A satellite. Located in the cluster of smaller asteroids, right of the asteroid Farek is hiding in (only during specific [[Feature episode#Re-Runs|re-runs]]). |
||
| ⚫ | |||
| + | * It is a good idea to equip your small craft with either a turret, a standard shuttle beam array or the [[Console - Universal - Point Defense System|Point Defense System]] console. The swarmers that you face near the end are not too difficult to defeat as they are one-hit kills, just annoying as they do little damage to you (if you're firing back) but it is good to have full 360 degree weapon coverage, however if you reverse, you can force the swarmers into the firing arc of most other weapons. |
||
| + | **If one had managed to reach {{mission|Sphere of Influence}}, the player should equip the beam array and warp core from the [[Ancient Obelisk Technology Set]]. Even without the 2-set bonus, it is still more powerful than the Rare shuttle beam array from [[Mission: The Vault]]. |
||
| + | ** Alternatively, AoE damage consoles like the Aceton Assimilator will also quickly and easily dissolve any issues. |
||
| − | {{ |
+ | {{All episodes}} |
| + | [[Category:Missions with career path-specific objectives]] |
||
| − | {{Klingon episodes}} |
||
| + | [[Category:Temporal Agent Event]] |
||
| − | {{Romulan episodes}} |
||
| + | [[Category:Gamma Quadrant]] |
||
Revision as of 04:46, 2 June 2019
- [Polaron Beam Array Standard Issue-S]
- [Jem'Hadar Combat Impulse Engines Mk X]
- [Jem'Hadar Deflector Dish Mk X]
In Operation Gamma, the player has to use a small craft and is sent through the Bajoran Wormhole to seek out a contact of the Dominion in the Gamma Quadrant.
Summary
The Gamma Quadrant beckons! Find a friend there who can lead you to the Dominion.
Synopsis
Outline
Mission Text
Federation
If Loriss and Kar'ukan have been unable to contact the Dominion, perhaps we can do it for them.
I have authorization to send someone to the Gamma Quadrant to seek out the Dominion and persuade them to help us with the Jem'Hadar occupying Deep Space 9. I want you to be that representative.
Kar'ukan's ships are guarding the wormhole, so access is limited. A small craft like a shuttle or fighter might be able to break through the blockade, so leave your ship here at Bajor.
Commander Samuel Winters is here and he is one of the best shuttle pilots I know. I recommend you bring him along.
The war is over, but Loriss and Kar'ukan won't believe it unless they hear it from someone they trust.
Klingon
Goal
Report to Deep Space Nine and enter the Bajoran wormhole.
Deep Space Nine is located in the Bajor Sector of the Alpha QuadrantThis is a small craft mission! You will need to use a shuttle, fighter or other small craft to complete this Episode!
If you do not have a small craft, report to Ship and Shuttle Requisitions on Bajor.
Objectives
- Flying Blind
- Go to DS9 System
- Signal Fleet
- Get Within Scanner Range
- Disable DS9's Sensor Clusters
- Defeat Jem'Hadar Attack Ship
- Use Wormhole
- Salvaged Relationships
- Go to Navigational Beacon
 Investigate Temporal Probe (Temporal Agent)
- Warp to Next System
- Destroy Shield Generator
- Enter the Asteroid
- Hail the Krannek
- Assist Farek
- [Engineering] Salvage Materials (0/4)
- [Tactical] Deactivate Defense Satellites (0/4)
- [Science] Recover Particle Traces (0/4)
- Rendezvous with the Krannek
- Defeat Idran Swarmer Groups (0/3)
- Follow the Krannek
- Approach the Jem'Hadar Ships
- Speak to Farek: Decide Her Fate
- Hail the Jem'Hadar
- Leave the Gamma Quadrant
NPCs
NPC starships
Allies
Federation
Typhoon Class Battleship(Replaced with a Fed. Command battle crusier after they were introduced to the game)
Ferengi
Enemies
Dominion
Cosmozoans
Accolades
| Icon | Name | Description | How to Get | Points |
|---|---|---|---|---|
| Anomaly Master | Completed the Science Option while playing the weekly episode Operation Gamma | Scan the four spatial anomalies in the blue asteroids | 10 | |
| Satellite Technician | Completed the Tactical Option while playing the weekly episode Operation Gamma | Scan the four Defense Satellites in the red asteroids | 10 | |
| Master Salvager | Completed the Engineering Option while playing the weekly episode Operation Gamma | Salvage the resources from the four ships in the yellow asteroids | 10 | |
| Best Served Cold | You destroyed Farek at the End of Operation Gamma | Decide to destroy Farek to earn the Vorta's trust | 10 | |
| Kind-Hearted | You let Farek escape at the end of Operation Gamma | Decide to let Farek go. | 10 |
Walkthrough
- For a walkthrough of this mission, visit the Walkthrough page.
Strategy Notes
Engineering Option: Salvage Materials
There are 3 types of Materials:
- Bolomite: Resonance Frequency Scan and then Geologic Analysis
- Cormaline: Geologic Analysis and then Micromographic Analysis
- Iridium: Micromohraphic Analysis and then Particle Beam
- In french version, as of may 2013, this part is quite untranslated, making it even harder to resolve. Solutions are : Iridium ("action C" -> "action D"), Cormaline ("action B" -> "action C"), Bolomite: ("action A" -> "action B")
Science Option: Recover Particle Traces
There are 3 types of Anomalies:
- Radiogenic Particles: Active Polaron Scan and then Polythermal Scan
- Trianium Particles: Polythermal Scan and then Quantum Scan
- Nucleogenic Particles: Quantum Scan and then High-Frequency Phaser Sweep
Tactical Option: Deactivate Defense Satellites
There are 3 types of Defense Satellites:
- Active Satellites: Use a Quantum Scan and then Remove Ionic Power Core
- Active Sensors: Remove Ionic Power Core and then Deactivate Sensor Batteries
- Active Enemy Detection: Deactivate Sensor Batteries and then use a Magnetic Wave Pulse
Mission Replay
This mission is repeatable through Mission Replay, although the Rewards for completing might be reduced. Items scale to a player appropriate level (Scaling Rewards), as followed:
- You choose 1 of the following:
- [Polaron Beam Array Standard Issue-S]
- [Jem'Hadar Combat Impulse Engines Mk <>]
- [Jem'Hadar Deflector Dish Mk <>]
- [Current Lock Box]
| Level | Rank | SP | Exp | Mark <> |
|---|---|---|---|---|
| 43–49 | 1935 | 1856 | X | |
| 50 | 2232 | 1949 | XI |
Feature Episode Notes
- Third of five missions of the fourth Feature Episode The 2800 released in February/March 2012. The missions were included for all factions at the end of the Cardassian Struggle/Dominion Domination storyline episode.
- The mission is part of the Feature Episode re-runs, and as such eligible for limited time, special mission rewards.
- During the second re-run (October 31 to December 5, 2013) the mission was eligible for the daily Lobi Crystal reward (once 15
 per player account and day).
- During the second re-run (October 31 to December 5, 2013) the mission was eligible for the daily Lobi Crystal reward (once 15
Notes
- Prior to Victory is Life, Weyoun's role was taken by the original character Eraun. Due to a glitch both Weyoun and Eraun's voices can be heard during the cutscene.
- If a character does not already own a shuttle or small craft, accepting this mission will grant a new ship slot and a free shuttle token (valid for a Type-8 Shuttlecraft for Starfleet captains or a Kivra Shuttle for Klingon captains).
- It is a good idea to equip your small craft with either a turret, a standard shuttle beam array or the Point Defense System console. The swarmers that you face near the end are not too difficult to defeat as they are one-hit kills, just annoying as they do little damage to you (if you're firing back) but it is good to have full 360 degree weapon coverage, however if you reverse, you can force the swarmers into the firing arc of most other weapons.
- If one had managed to reach “Sphere of Influence”, the player should equip the beam array and warp core from the Ancient Obelisk Technology Set. Even without the 2-set bonus, it is still more powerful than the Rare shuttle beam array from Mission: The Vault.
- Alternatively, AoE damage consoles like the Aceton Assimilator will also quickly and easily dissolve any issues.